Showing posts with label Decor. Show all posts

Tuesday, June 21, 2016

DIY Inspiration: Yarn and Weaves

Hello friends,

Hope you are having a wonderful mid-2016! While most of you are probably basking in the summer sun, we here in the southern hemisphere have the onslaught of winter upon us, which on the bright side, brings plenty on indoor time for me and my hot chocolate!

I have been really into yarn crafts for a long time now and lately, although they have been around for a while, I'm loving the plethora of colorful and fun woven wall decor that has been going around on inspo boards everywhere. (Maybe its the winter talking, I don't know ) Say what they may, I think they're here to stay! Some of the weaves seem great for summer too! 

Check out these gorgeous weaves from across the internet that are calling out to me right now :)


Aah the colors! 

-JE

Wednesday, April 20, 2016

DIY 3D Phulkari Wall Accent Art

Hello Lovelies! Hope you doing great in the year 2016! 

While life has been happening as it does, I've been into a lot of DIY projects too, especially those with local influences. In order to not stick to my current annual schedule of posting, I want to get to sharing recent projects with you all right away. :)

While I have become somewhat a pro at moving locally, the move across countries has been a whole other story. It is exciting for so many reasons least of all being a complete overhaul to one's DIY ideas and opportunities!

So, today we are going to talk about how one can put some life in those boring blank corners of the home you so cherish, when one is neither particularly inclined to be indulgent with time or money - especially when one has a stash of beautiful, sentimentally valued, fabric that was partially ruined in the Great First Floor Flood of 2015 (Another story for another day!).

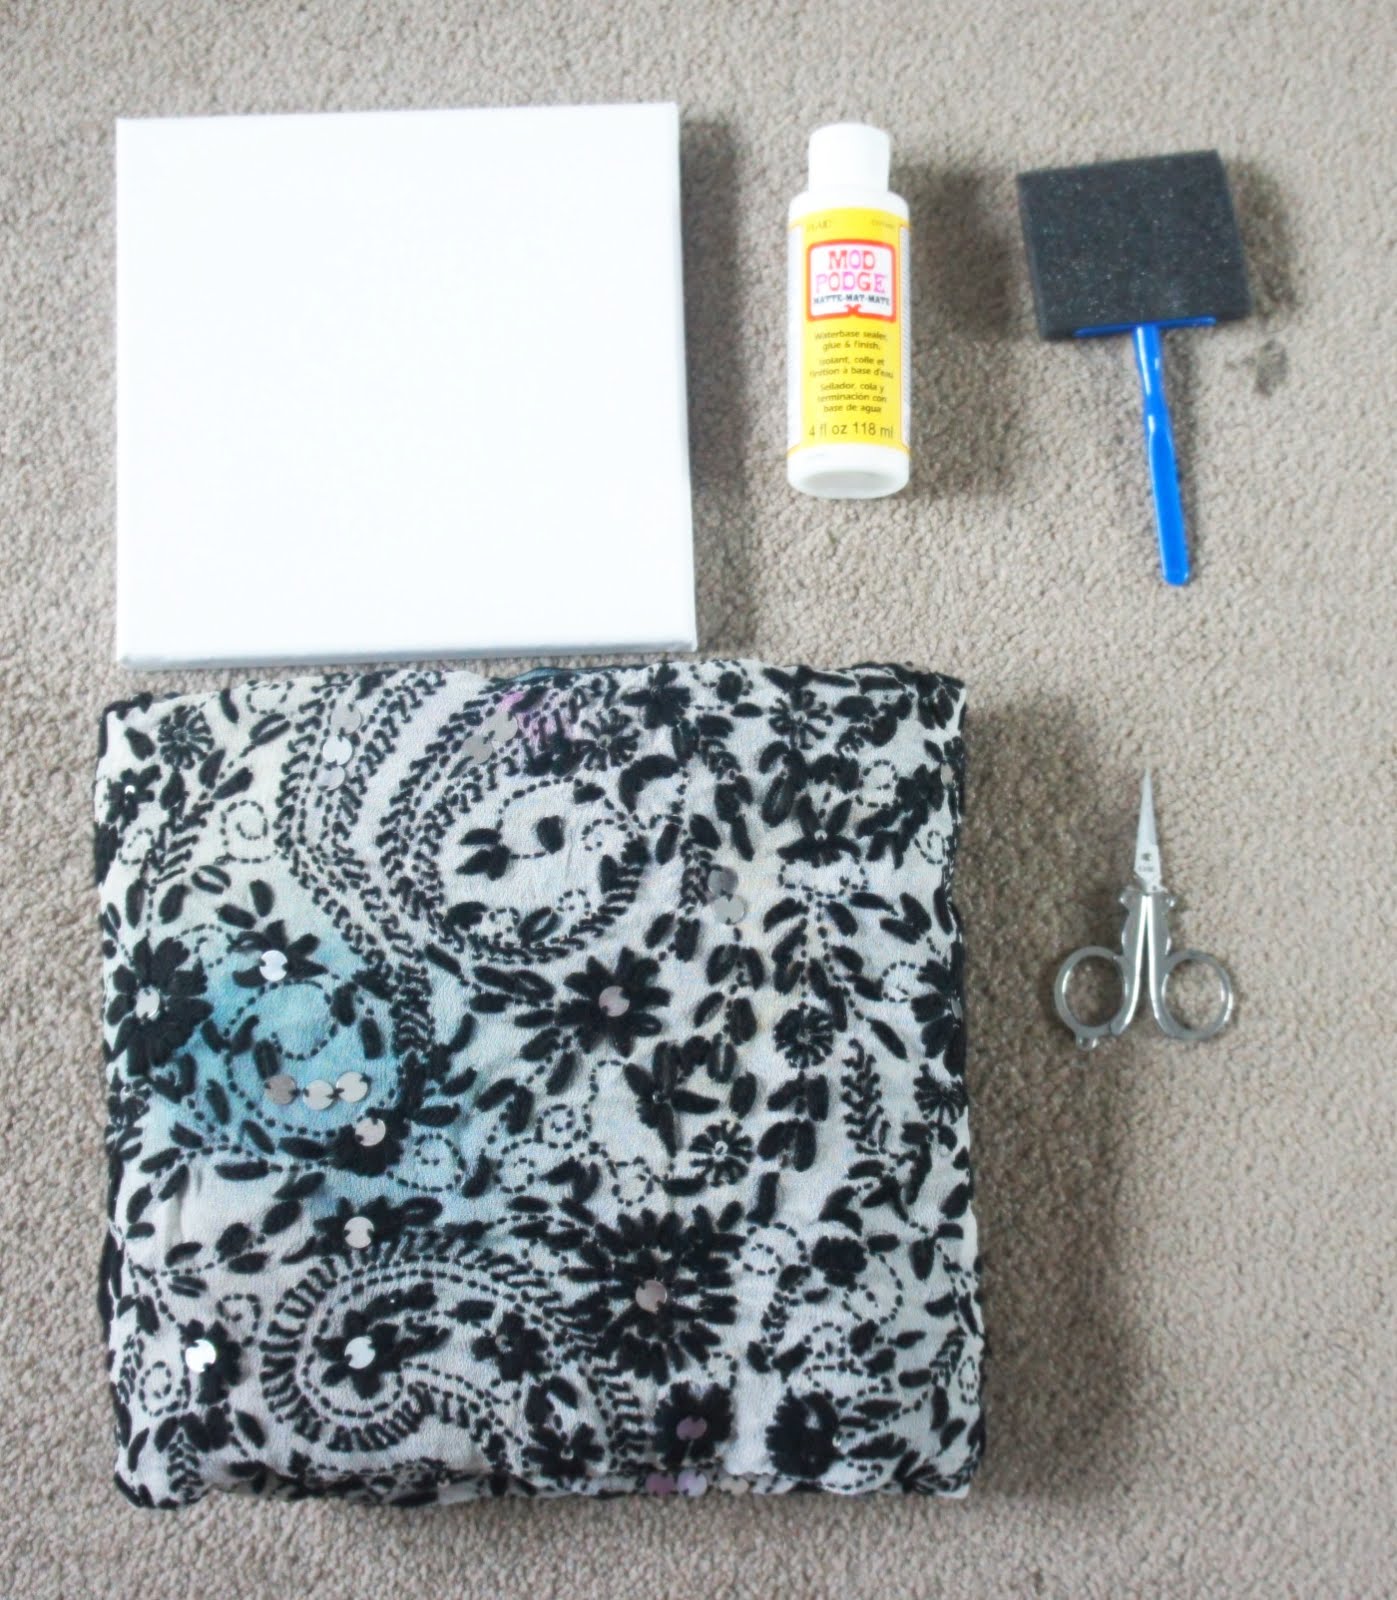
Here's what you need:

  • A blank canvas (any size)
  • A beautiful piece of embroidered fabric (Can you see the ruined blue patches?)
  • Mod Podge Matte, or any decoupage glue of your choice
  • A foam brush
  • A sharp pair of scissors
  • Chalk paint (optional)

Step 1: Cut a piece out of the good fabric portion around the canvas, leaving a margin of about an inch

Step 2: Cut the corners of the fabric square diagonally for an inch, up till you reach the canvas. Ensure that the fabric is laid as flat as possible before you do this


Step 3: Apply a thin, even layer of Mod Podge across the canvas. If you like your canvas to be fully covered, apply on sides at this point too. Else, exclude sides.


Step 4: Pull the fabric slightly taut and lay it flat on top of the canvas after about one minute of applying the glue.Press lightly on the fabric to ensure you get a even "stick".


Step 5: Without waiting for it to dry completely, apply another layer of Mod Podge on top of the fabric and press evenly down. Wait up till completely dry i.e when the glue becomes clear.


Step 6: Now cut the fabric at the edges of the canvas in a straight line and remove any extra threads that hang out due to the embroidery. Glue down the edges if required.


Step 7: Apply two layers of the chalk paint of your choice all around the edges and let dry, This could be a really fun step with contrasting or even neon paints up the sides of the canvas for accented decor!


Step 8: Apply a final layer of Mod Podge all over and let dry completely. Hang to please!


Cheers
-JE

Wednesday, April 8, 2015

DIY Chevron Renter's Decor

Its quite a challenge to D.I.Y when you basically don't have any materials for the "I" part - considering the major offload usually done at the time of move! Yet the mind is a restless thing - wandering incessantly when you're unemployed and have all the time of the day. You would think of all possible ways to savour this time and enjoy the stillness and laziness of this moment - but when you are trained to time-manage to the nth second of the day, it kind of becomes like "WTH happened?"! Well I always said, "Bad weather and a pair of scissors is a dangerous combination!".
 
So today we have a very easy, very fast and very fun DIY Renter's Décor:
 
What you need:
  • A pair of scissors (even blunt ones will do!)
  • Chevron printed duct tape
  • Items of furniture you find rather bland ;)

 
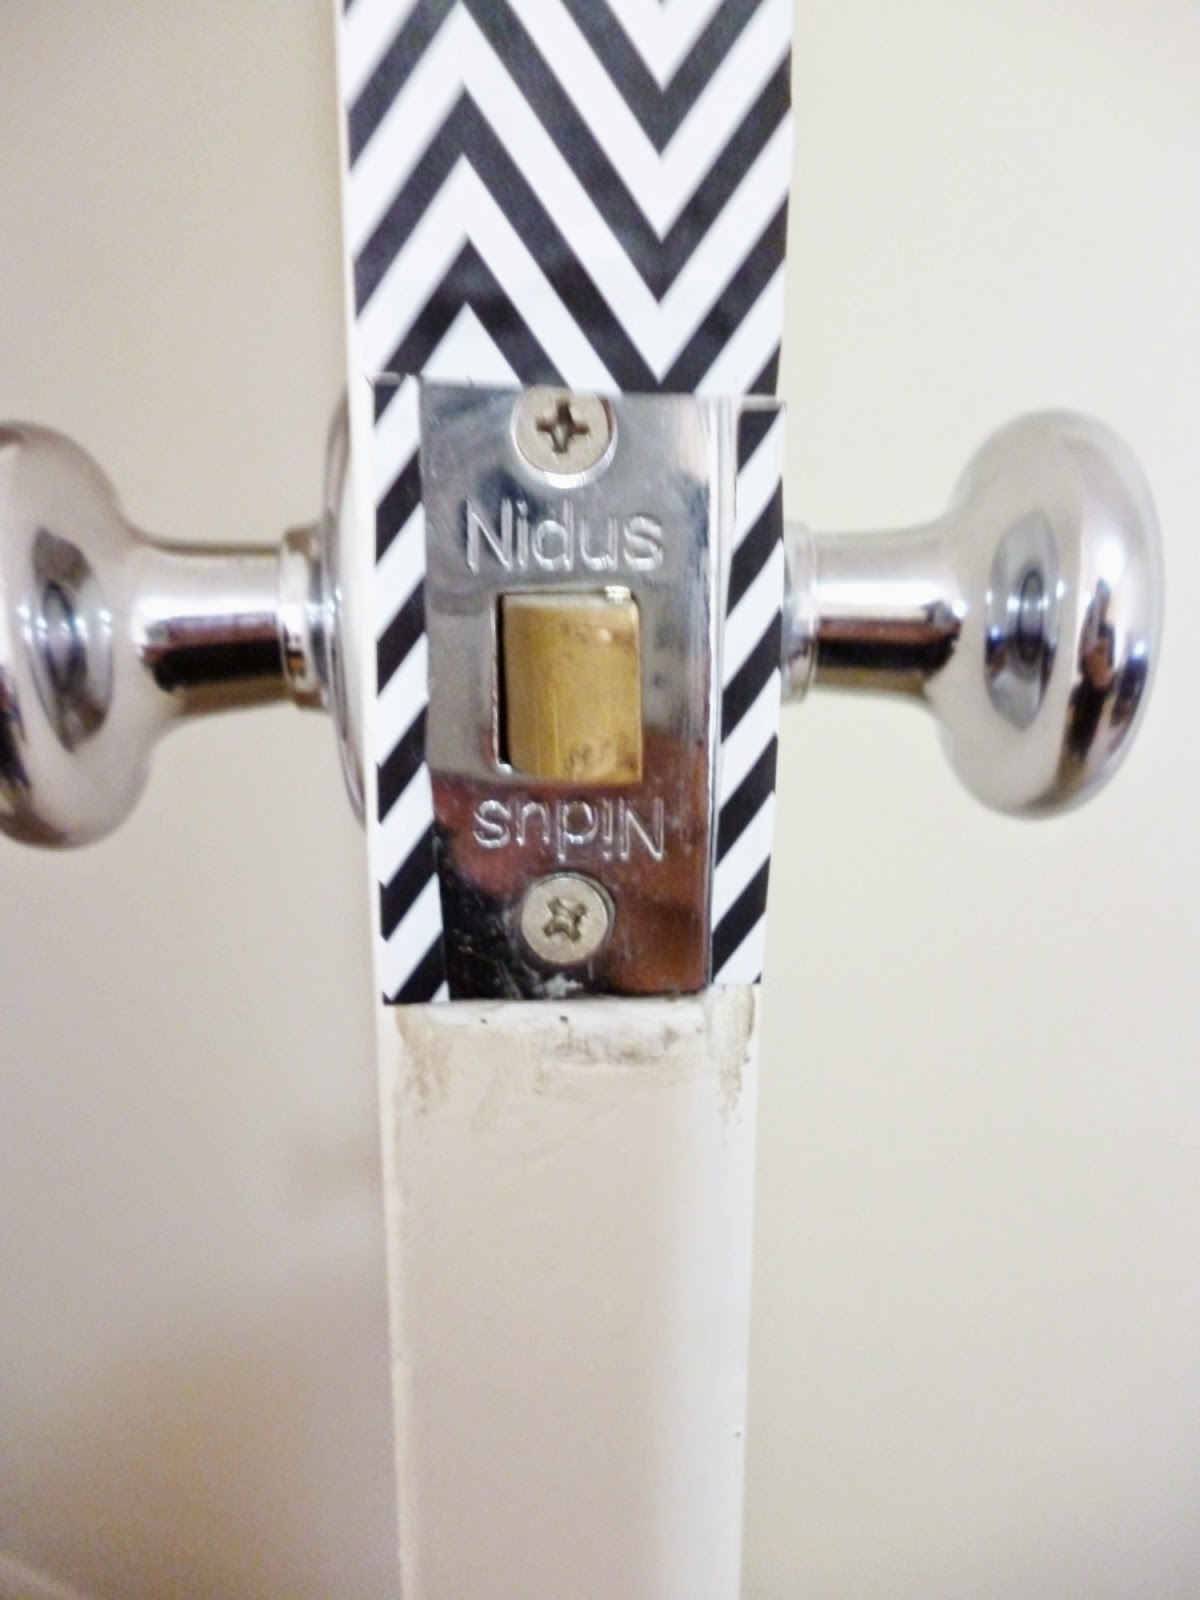
Step 1: I started with the door. Start from the top and slowly smooth over the duct tape onto the side of the door up till the latch. Right above the latch cut the duct tape in a straight line.


Step 2: Fold over the extra duct tape at the side towards the front and neatly cut the extra in a straight line. Save the extra cuts. At this point the duct tape should cover the door side exactly. Fold over any additional tape backwards on the door back. Ensure that this is not more than 1-2 mm to preserve neatness.


Step 3: Align the extra cuts to match the pattern at both sides of the latch. Trim off the additional tape if any.


Step 4: Repeat steps 1 and 2 for the bottom half side of the door.


Ta-da! Here you have your chevron door that you can plain-down any time you want! Restricting yourself to the door is a hard thing to do though!


Sunday, March 9, 2014

DIY : Decorative Floral Rose Ball

A month into Valentine's day. yet roses are in all year round. Which is why Itsy Bitsy India came up with this appropriately named challenge Itsy Bitsy Say It With Roses Challenge. I was debating with myself since the challenge was announced - I knew I wanted to be a part of it, but I wasn't sure how. That is, until I came across this wonderful DIY by Geneva @ A Pair and A Spare and bam! - I knew what I loved :)

I also had the following constraints if I were to go for my own version
  • I wanted something permanent
  • I did not want to spend more than my set limit
  • I wanted it to go with my living room
  • I did not want real flowers to die (I'm weird that way)
So I decided to do my version with paper flowers, thermocol balls and leftover wallpaper.

Here's what you'll need to do this version:
  • A thermocol ball about 14 cm in diameter
  • Wallpaper (can be replaced by any craft paper of your choice)
  • Super Glue (or E6000)
  • Craft Glue (or Fevicol)
  • Drawing pins (I used 28 mm ones)
  • Scissors
  • An old CD (optional)
  • Yarn (optional)


Step 1: Use the CD to draw circles on the back of the wallpaper and cut them out. To cover 1 ball you'll need to have around 40 circles.


Step 2: Cut into the circular shapes spirally, ensuring that all the circles are cut with the same thickness. To add the little edge to the flowers, you can cut imperfectly into the circles (yay!)


Step 3: Start rolling the paper inwards from the edge up till you reach the center, which becomes the base. Glue with quick-drying super glue The gold color comes inside the roll. For a detailed tutorial on how to make rolled paper roses, see here and here. Continue rolling all the spirals up till you get a bunch of paper roses that look like this.


Step 4: Take about a meter of cotton yarn and wrap it around you index and middle finger. Remove after wrapping and you will have a yarn "O" with you. With craft glue, press this "O" vertically onto the thermocol ball and hold down with clear tape. This is to provide an arrangement for hanging the ball later. You can skip this step if you don't plan to hang it.


Step 5: Diagonally opposite to the yarn, put a 2-3 drops of craft glue and place the base of a rose. Push a drawing pin through the center of rose into the thermocol to hold the rose down. Allow to dry.


Step 6: Continue gluing and pinning roses close to each other from bottom up until the whole ball is covered. Leave to dry overnight.


You can even paint on the back of the wallpaper for interesting effects :)


Hang them around your home to enjoy interesting personalized decor!


Thank you in advance ;)