Tuesday, May 9, 2017

25 Easy Ways to be Impactfully Green

The previous year has been very eventful for us as a human race - surprising turn of political events, terror attacks, hate crimes, rise of feminism awareness, discussions about climate change, you name it. There have been events which have brought many sensitive issues to the mainstream discussions - perhaps issues that we knew existed forever, but have never been as important as they are today.

Let's start with climate change.There is so much focus lately on being green, being earth-friendly and the drastic ways in which our beautiful planet has changed in the last couple of decades. We may be nearing the end of the diversity and delicate balance that our planet has maintained for millions of years. Some sources say that the most likely impact of this disturbance of ecological balance will be natural disasters of a scale that has never been witnessed before. There is also conclusive evidence that this process has already begun.

The responsibilities that our generation has to shoulder are completely different from those our parents' or grandparents' generations have had to. Our actions individually seem to be minuscule, but every drop makes an ocean and collectively, we can make a massive difference. I have been thinking a lot about this lately and am trying to include actions that prevent environmental damage in my life. These are small things that sometimes slip our minds:

  1. When buying goods that are surely not going to be returned, don't get the receipt printed
  2. Limit the number of grocery bags used, either by squeezing maximum items into them, or by carrying your own cloth bags
  3. Cancel subscriptions of magazines/newsletters you no longer read (i.e end up throwing out)
  4. On the same note, shift current subscriptions to online ones if possible
  5. Buy a reusable coffee cup for your daily coffee
  6. Buy goods with minimal packaging or packaging that can be recycled
  7. Reuse unavoidable plastic grocery bags as garbage bags
  8. Buy classic pieces of clothing that can be used in many ways for many occasions
  9. Nothing wrong with buying or using second hand goods (Op-shopping!) - I have scored so many beautiful pieces of furniture and new clothes with price tags attached at dirt cheap prices through Ebay or Op Shops (Guilt free too ;))
  10. Donate items you no longer use to the needy or to opportunity shops so that they can get more use before their end of life
  11. Exchange clothing/shoes/accessories with your girls to get new items without a cost to the planet!
  12. Avoid takeaway plastic spoons and chopsticks by carrying your own (washable) spoon and fork
  13. RED-cycle things that cannot be recycled :) Check it out in Australia: http://www.redcycle.net.au/ 
  14. If you are okay with using it, get toilet paper made from recycled paper (100% earth friendly!)
  15. Save good-looking shopping bags for up-cycling and gift-giving rather than purchasing gift bags separately
  16. Reuse cloth towels a couple of times before throwing it into wash (interesting article on recommended uses before washes!)
  17. When doing laundry, wash on the cold cycle unless otherwise required
  18. Minimize dryer usage by drying clothes outside (if the weather permits) and save on electricity costs too!
  19. Recycle or up-cycle clothing. Check out this woman's 1200KM bike ride through China!
  20. When going somewhere nearby, walk instead of driving and creating fuel emissions. Get healthier and richer with this one too ;)
  21. As much as possible, avoid food wastage by cooking in edible portions only, or, get creative with leftover recipes
  22. Get greener, healthier and richer by avoiding processed food and opting for fresh, natural food. Processed food factories are factories too 
  23. Get public transport where possible - its not a lonely world where we live in! If you must drive, try carpooling - also a great way to make friends!
  24. Schedule in mindfulness and other joyful activities like hobbies, friends, developing skills etc in your life to create a rich and full existence with less stuff.
  25. Minimize, minimize, minimize consumption! Remember how lucky we are to get all the comforts that we have today, when just a couple of generations ago, our ancestors were living with the bare minimums.


Related image

Image result for beautiful earth

Image result for beautiful earth

Something this beautiful is worth preserving.

Tuesday, June 21, 2016

DIY Inspiration: Yarn and Weaves

Hello friends,

Hope you are having a wonderful mid-2016! While most of you are probably basking in the summer sun, we here in the southern hemisphere have the onslaught of winter upon us, which on the bright side, brings plenty on indoor time for me and my hot chocolate!

I have been really into yarn crafts for a long time now and lately, although they have been around for a while, I'm loving the plethora of colorful and fun woven wall decor that has been going around on inspo boards everywhere. (Maybe its the winter talking, I don't know ) Say what they may, I think they're here to stay! Some of the weaves seem great for summer too! 

Check out these gorgeous weaves from across the internet that are calling out to me right now :)


Aah the colors! 

-JE

Wednesday, April 20, 2016

DIY 3D Phulkari Wall Accent Art

Hello Lovelies! Hope you doing great in the year 2016! 

While life has been happening as it does, I've been into a lot of DIY projects too, especially those with local influences. In order to not stick to my current annual schedule of posting, I want to get to sharing recent projects with you all right away. :)

While I have become somewhat a pro at moving locally, the move across countries has been a whole other story. It is exciting for so many reasons least of all being a complete overhaul to one's DIY ideas and opportunities!

So, today we are going to talk about how one can put some life in those boring blank corners of the home you so cherish, when one is neither particularly inclined to be indulgent with time or money - especially when one has a stash of beautiful, sentimentally valued, fabric that was partially ruined in the Great First Floor Flood of 2015 (Another story for another day!).

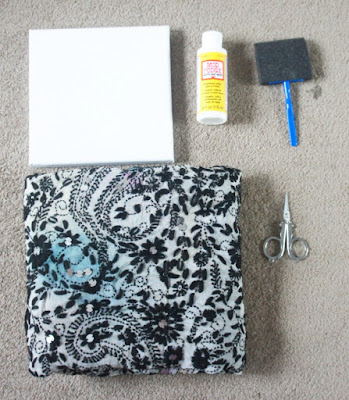
Here's what you need:

  • A blank canvas (any size)
  • A beautiful piece of embroidered fabric (Can you see the ruined blue patches?)
  • Mod Podge Matte, or any decoupage glue of your choice
  • A foam brush
  • A sharp pair of scissors
  • Chalk paint (optional)

Step 1: Cut a piece out of the good fabric portion around the canvas, leaving a margin of about an inch

Step 2: Cut the corners of the fabric square diagonally for an inch, up till you reach the canvas. Ensure that the fabric is laid as flat as possible before you do this


Step 3: Apply a thin, even layer of Mod Podge across the canvas. If you like your canvas to be fully covered, apply on sides at this point too. Else, exclude sides.


Step 4: Pull the fabric slightly taut and lay it flat on top of the canvas after about one minute of applying the glue.Press lightly on the fabric to ensure you get a even "stick".


Step 5: Without waiting for it to dry completely, apply another layer of Mod Podge on top of the fabric and press evenly down. Wait up till completely dry i.e when the glue becomes clear.


Step 6: Now cut the fabric at the edges of the canvas in a straight line and remove any extra threads that hang out due to the embroidery. Glue down the edges if required.


Step 7: Apply two layers of the chalk paint of your choice all around the edges and let dry, This could be a really fun step with contrasting or even neon paints up the sides of the canvas for accented decor!


Step 8: Apply a final layer of Mod Podge all over and let dry completely. Hang to please!


Cheers
-JE

Wednesday, April 8, 2015

DIY Chevron Renter's Decor

Its quite a challenge to D.I.Y when you basically don't have any materials for the "I" part - considering the major offload usually done at the time of move! Yet the mind is a restless thing - wandering incessantly when you're unemployed and have all the time of the day. You would think of all possible ways to savour this time and enjoy the stillness and laziness of this moment - but when you are trained to time-manage to the nth second of the day, it kind of becomes like "WTH happened?"! Well I always said, "Bad weather and a pair of scissors is a dangerous combination!".
 
So today we have a very easy, very fast and very fun DIY Renter's Décor:
 
What you need:
  • A pair of scissors (even blunt ones will do!)
  • Chevron printed duct tape
  • Items of furniture you find rather bland ;)

 
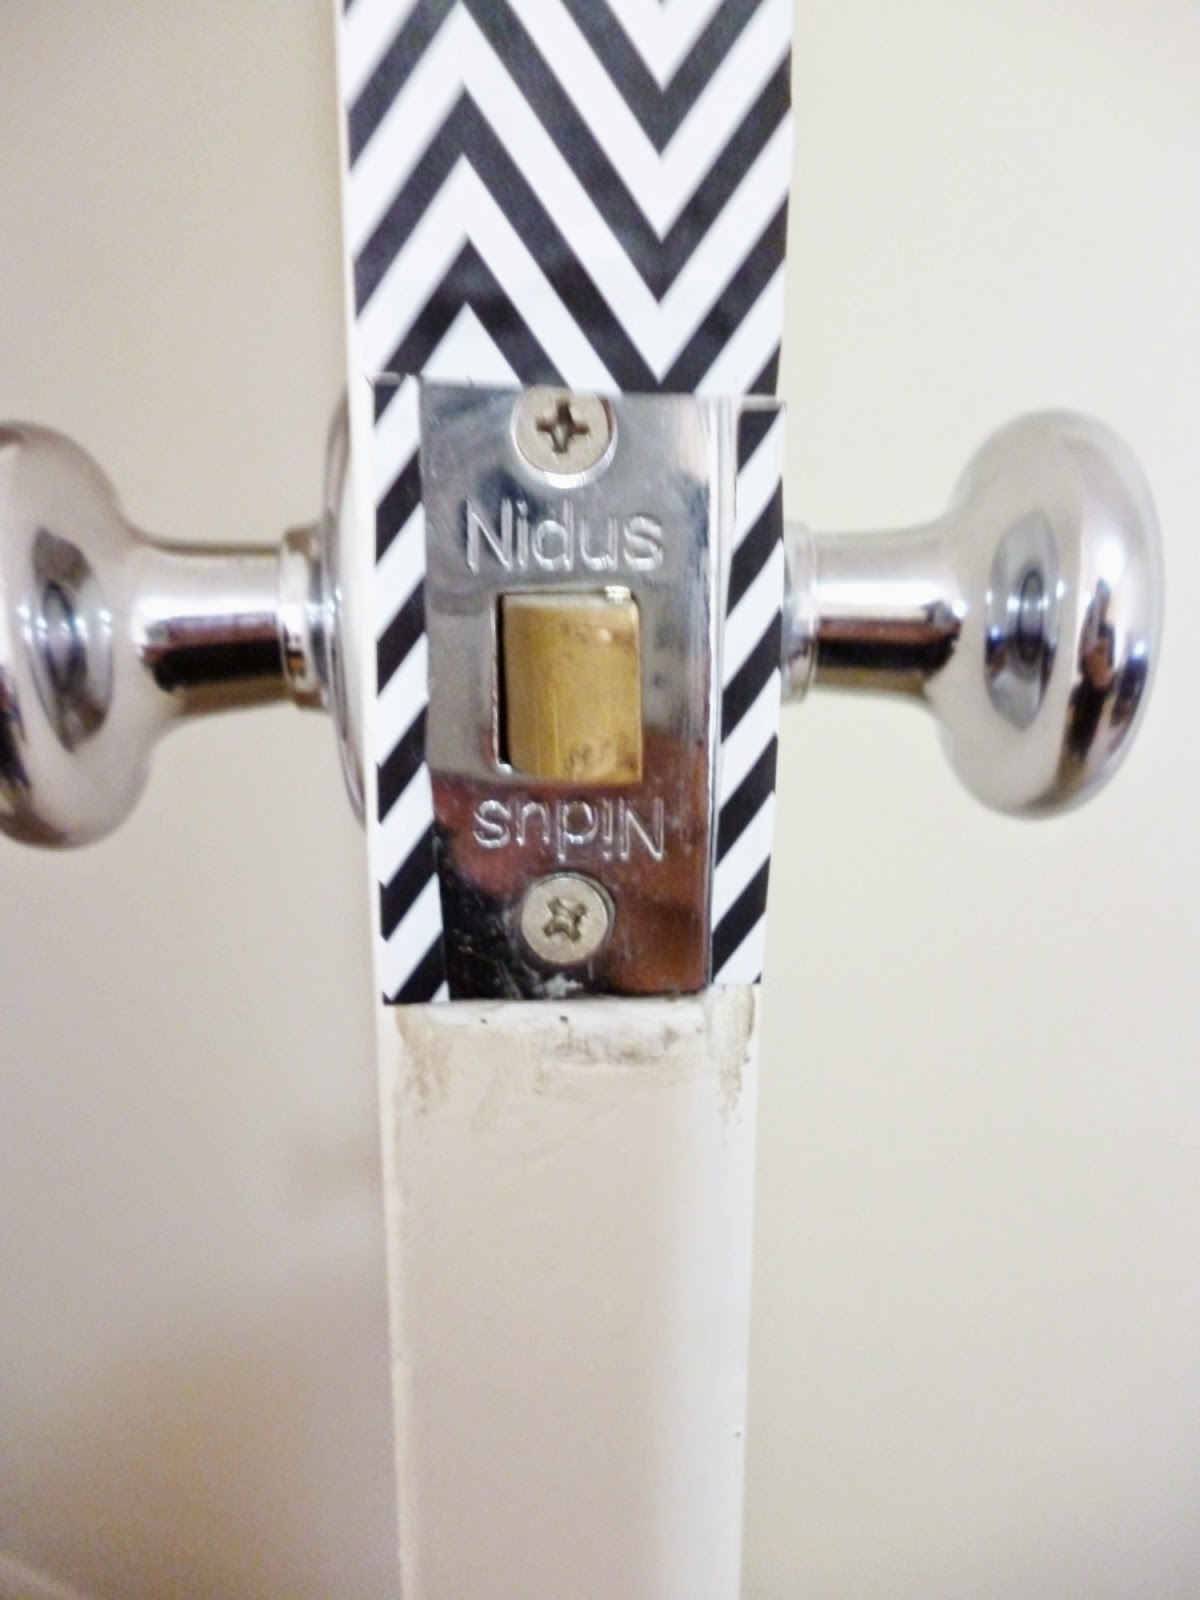
Step 1: I started with the door. Start from the top and slowly smooth over the duct tape onto the side of the door up till the latch. Right above the latch cut the duct tape in a straight line.


Step 2: Fold over the extra duct tape at the side towards the front and neatly cut the extra in a straight line. Save the extra cuts. At this point the duct tape should cover the door side exactly. Fold over any additional tape backwards on the door back. Ensure that this is not more than 1-2 mm to preserve neatness.


Step 3: Align the extra cuts to match the pattern at both sides of the latch. Trim off the additional tape if any.


Step 4: Repeat steps 1 and 2 for the bottom half side of the door.


Ta-da! Here you have your chevron door that you can plain-down any time you want! Restricting yourself to the door is a hard thing to do though!


Thursday, March 26, 2015

Shiftin' and Driftin'

It's been a while since I wrote here and I really want to tell you why. I mentioned in a few of my previous posts about a big change due. Well, here it is! I've moved continents to Australia!
 
Moving is both exhausting and exciting, especially when it offers possibilities of new beginnings. For those of you who know me, I'm not the kind to stay in the same town/house for a long while. Call it restlessness or a desire to start afresh, I love the idea of offloading all the *junk* in my life, streamlining it and starting simple and fresh again - it has a way of reminding me of all the things I have been blessed with in my life and pushing me to re-evaluate all that I really need to be simply happy. Although I dearly miss my family and friends already.
 
Shifting almost plan-less to a city as new and as activity-rich as Melbourne is an adventure, albeit one that's scary as hell too! What does this city have to offer? What makes it tick? What's hidden in nooks and corners? It is interesting to note the significant cultural differences and subtle ways the city starts changing your perspective.
 
While I'm walking around aimlessly (and figuring out how to re-establish here) here are some unedited shots of Melbourne in an excitable new-comer's eye:


 Cheers!


Sunday, December 21, 2014

DIY Jewelry Recycle Series : Part 7 - Extender Bracelet Watch

It's been a while since I have gotten a moment like this. In the fast blur that is life sometimes, there is something very rare and precious about the odd moments that come by that one has to do absolutely nothing. It is truly a time of peace watching the shortest day of the year pass by, while listening to the far away sounds of neighborhood kids playing cricket and sipping hot chocolate. 

More on that later - for now let's just ring in the New Year!! What do you do with a beloved watch with worn down straps that just won't get replaced? Well....

What you'll need

  • Your favorite watch dial
  • The bracelet you never wore
  • Elastic beading cord
  • A pair of scissors
  • Super Glue/E6000

Step 1: Break down the bracelet to its findings. You may also choose to add in findings of your choice.


Step 2:  Take 2 pieces of the stretchy cord about 30 cms in length. Push the cord through the holding wire off one end of the dial and tie into a triple knot. Add in a drop of instant glue to secure.


Step 3: Start putting in the bracelet findings in the reverse order and direction. 


Step 4: Continue beading in reverse while checking for the size that fits your wrists the best. 


Step 5: Tie to secure at the second holding wire or the first wire by going behind the dial. Add in a drop of instant glue at each knot.


Step 6: Flip over the dial and findings and voila! You have yourself a new extender bracelet watch!! Great to bling it up at NYE parties!


Cheers!
- JE

Saturday, December 6, 2014

I'm Back!

Dear Readers, after a much needed hiatus, I'm finally back! 

I've been going through what I call a "Rollercoaster Phase". As I mentioned previously, I had been working a few personal commitments since last year. You know the feeling, when you want something so badly and you are ready to shed blood, sweat and tears - and the moment when you suddenly reach the tip of your uphill journey and its finally time to roll!

I thought about writing a million things and a million times during my break - but as expected, the days were long and the moments were short! As I continue to go through this exhausting but beautiful phase of life, I'll be back here intermittently and perhaps with less frequent posts. But come next year, things will be in full swing with a lot more surprises! 'Till then, I hope to share with you a few thought and creations as they come :)

Happy Holiday Cheer, everyone :)


-J