Friday, May 30, 2014

DIY : Yarn Tassles

As you all probably know, I've been obsessed with tassels and fringes lately (See here). While there are many, many ways I want to get tassel-fied, it seems like making one's mind is so not an easy job when one is crazy about something (Read: Aztec tattooed fish). Therefore, a wise man once said "one step at a time", and I thought, "Why not".

So, will start with just making the tassels for now. Will think about where to put them later. "The House of Crap" (as my family puts it) did spit out some old yarn that was never used. Btw, I'm so going to lose that name by the end of this year! More on that later.

Here's what you'll need to make your own tassels:
  • A thin cardboard box/piece about the size of tassel you're going for
  • Yarn, proportionate to the number of tassels you want
                                        
That's all, really!

Here's how you can do it:
Step 1: Wrap the yarn in loops around the box to obtained the desired thickness. Around 40 loops give a medium thick tassel.


Step 2: From the remaining yarn, snip off a foot and fold in half.


Step 3: Slide the folded end under the wrapped yarn and push to the top of the wrapped section.


Step 4: Make a tight double knot and cut the folded end of the foot-long piece of yarn.


Step 5: Slide out the non-knotted end of the wrapped yarn and cut it in half.


Step 6: Fold the two ends of yarn over and insert another foot-long piece folded in half behind it.


Step 7: Make another double knot.


Step 8: Wrap the ends of the knotted piece around the neck of the tassel and tuck.


Step 9: With a sharp scissor, even out the bottom of the tassel.


There they are! Hell-o summer!


Monday, May 26, 2014

DIY Inspiration : Fringes and Tassels

I've been wanting to make something with tassels and fringes for quite a while now, but somehow I haven't been able to get around to it. So you can imagine the torture that ensues when gorgeous creations with max inspiration potential are encountered, but with no chance to make them! (Arrrrrghhhhhh!!)

Eh! It'll happen when it happens :) Meanwhile, thought of sharing some simply beautiful works of art by talented artists out there. Click on images for source info.


Especially love this bag!


Marc Jacobs loves tassles too


Super awesome gypsy art


These ladies created something wonderful!


Next three pics are my favorite


Sunday, May 18, 2014

DIY Jewelry Recycle Series : Part 5 - JCrew Bubble Neon Necklace

Bright and neon colors are so "in" these days. Every magazine and fashion column one reads advises you to add a "pop of this" or a "pop of that" somewhere or the other. Frankly, I've always been into bright colors and pops. I mean, what's not to love about them? A touch of bright instantly cheers me up, which probably (hopefully) cheers others around me on dull days. Anyhow, my sister came up to me with this lovely Grey JCrew Bubble necklace and asked me if I could add some color to it. 

Here's what you'll need:

  • Old Bubble necklace
  • Hot pink spray paint
  • Painter's tape
  • Another old beaded necklace/beads
  • Jewelry Tools

Step 1: Take apart the chain and bead findings from the necklace, retaining the bubble findings.


Step 2: Cover the bubble encasing with painter's tape as much as possible, to avoid getting paint on it.


Step 3: Spray the bubbles with selected color of paint. Apply thin light coats for most uniform coverage.


Step 4: Allow the paint to dry. Now carefully remove the painter's tape off.


Step 5: Attach the chain finding back to the necklace.


Step 6: Now the choice is yours whether you want to retain the original necklace beads or add in new ones. I had this one necklace with pretty gold beads lying around.


Step 7: Obtain the replacement beads of your choice.


Step 8: Drive in head pins through the beads and attach to the necklace.


Voila!


Tuesday, May 13, 2014

Quirky Food Diaries : Part 1 - Tofu Bites

When it comes to food, especially cooking it, friends and family would tell you that I'm somewhat an eccentric. This, of course, means that my meals are often either well received or dissed! There is no middle path. I'm quite a lazy cook (as you have seen here) and my relationship with making food lasts only as long as there's something new or exiting in the kitchen or about the dish.

I do like to try out how different ingredients in my fridge go together though. Among the many, many experiments those around have been subjected to, this one turned out to be well-appreciated, which is why I thought of sharing it with you all (:D)

So... presenting... tofu bites!!

Here's what you'll need:
  • Plain tofu
  • Pizza seasoning - oregano mix, chili flakes
  • Tomato ketchup
  • Zucchini chopped
  • Spring onions chopped
  • Roasted cashews (optional)
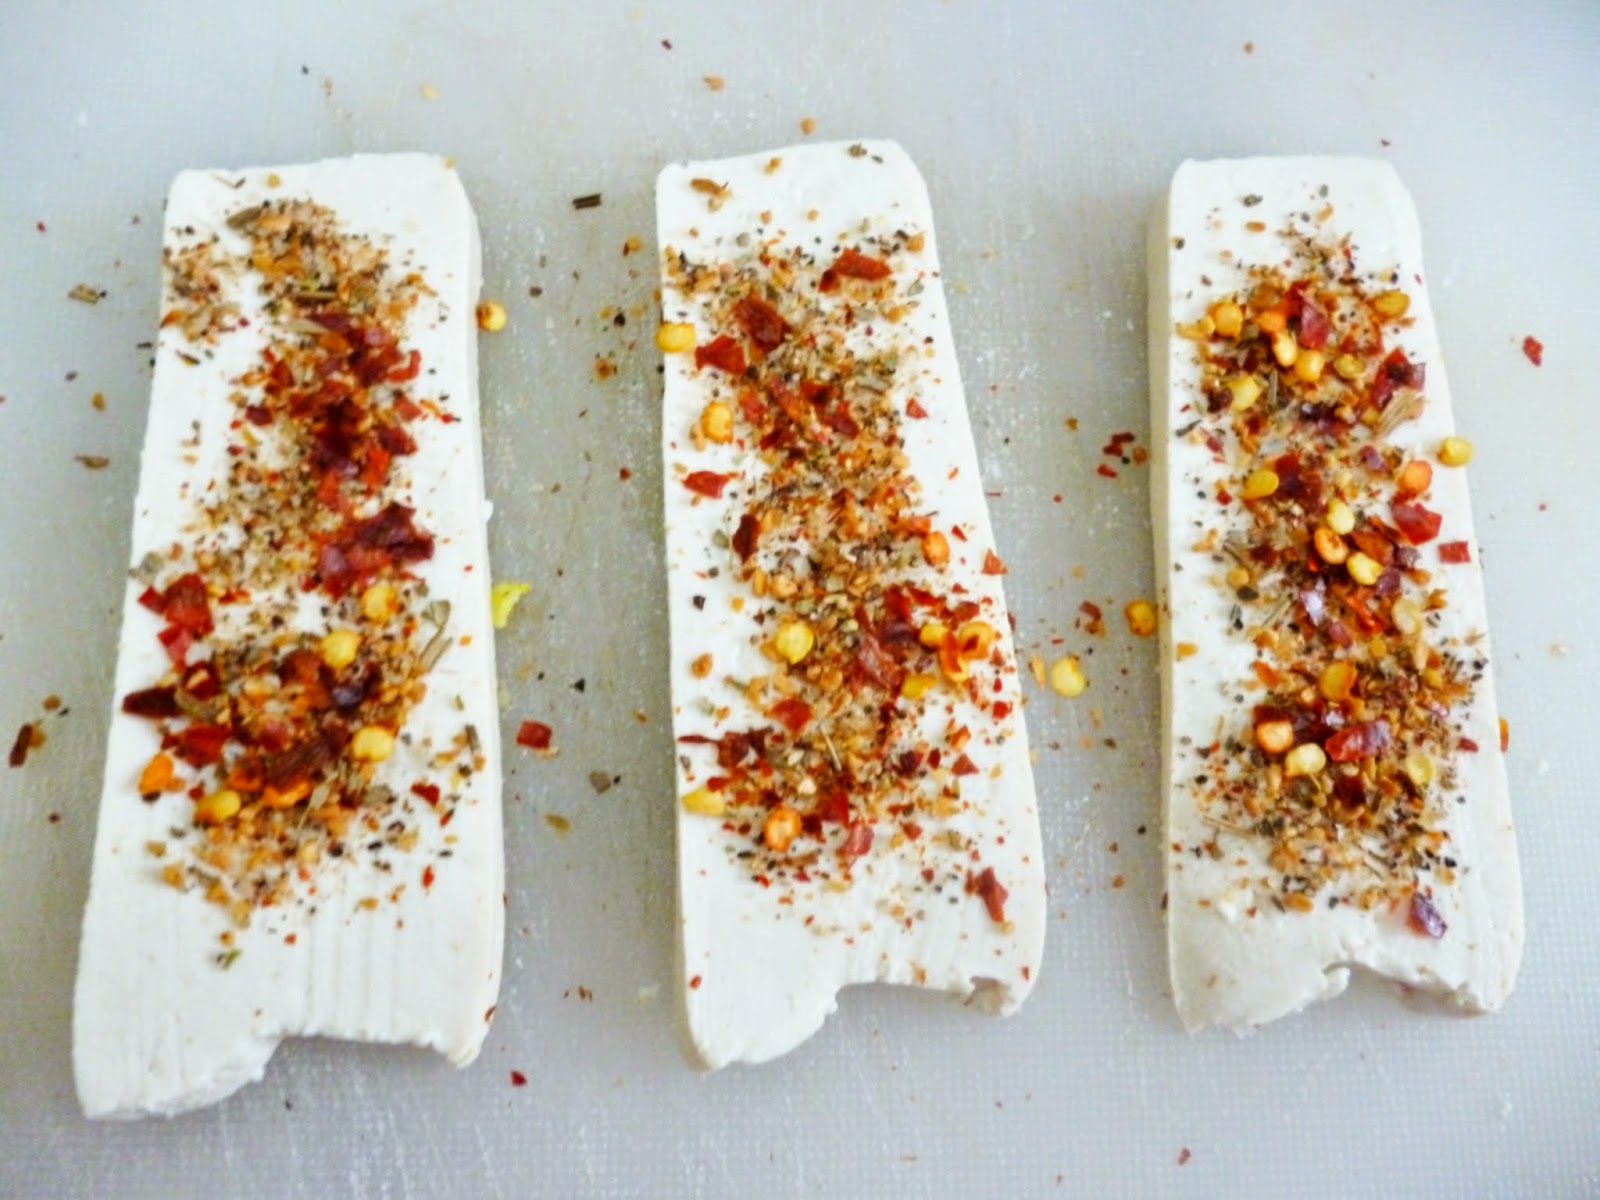
Step 1: Cut out strips of tofu about a quarter inch thick and an inch wide.


Step 2: Sprinkle pizza seasoning on them. This one is an Oregano mix from Domino's Pizza consisting of Oregano, Basil, Salt, Pepper among other things.


Step 3: Sprinkle chili flakes to taste. This is Domino's mix again.


Step 4: Squeeze out a line of ketchup on each of the tofu strips.


Step 5: Arrange zucchini pieces on the ketchup for hold.


Step 6: Add in the spring onions between the zucchini.


Step 7: Top with a couple of roasted cashews.


This healthy recipe took like 7 minutes and was consumed in lesser! It was surprisingly filling. What do you think?


Saturday, May 10, 2014

Hotel Sherlock | Ooty | India

A couple of winters ago, I had the good fortune of visiting Hotel Sherlock in Ooty. I was blown away from the start. Being a fan of Sherlock Holmes, the name itself aroused my curiosity. Imagine my delight when I discovered that we have themed hotels here in India, in the town next door!!

This home-converted-to-hotel is situated advantageously at a vantage point in Ooty with a breathtaking view of the town and the valley below. With a small winding road up a hill, entrance through an ornate iron gate, and a beautiful path surrounding by flowers leading to its door, it feel like you're leaving a world behind. I'm still not able to decide on my favorite view, given that Ooty looked gorgeous both in sunlight and clouds from here. 

The best part were the interiors of this cozy stay-in. We were in a room called Black Peter, complete with appropriately "olden" themed  (No kudos to my architectural knowledge) decor with its very own fireplace! The room had a small awning with a glass front that looked directly into the garden and hills. While the room decor was fascinating to look at during the day, the howling winds of the night with the unsettled mist gave it quite a spooky feel.

The staff was super courteous and welcoming, and the place gave a memorable ring to Ooty for us. Hopefully, one day, I'll be back ;)

Meanwhile....

The beautiful entrance way:


Going forward, we were taken to the cottages, all named and themed after different Sherlock murder mysteries. The beautiful cottage area:


The view from our room


The restaurant (with a themed menu):


The gallery with the entire Sherlock Holmes collection and a peaceful reading area, for when you just want to be away from it all. (Did I mention Christmas season had just started?)


Beautiful night look:


On a side note, can't help but mention the delish Ooty chocolates (70% cocoa YUM!), some of the best I've had!


Happy weekend people :)